
Supabase is a backend development platform that allows us to build modern applications with a real-time database, authentication, and integrated storage.
Designed as an open-source alternative to Firebase, Supabase is built on PostgreSQL and provides a set of tools that simplify backend development and management.
Key features of Supabase,
- Real-time database: Uses PostgreSQL with real-time capabilities, allowing subscriptions to changes in the database.
- Authentication and authorization: Provides a complete user authentication system and permissions management.
- Automatic RESTful API: Automatically generates a RESTful API based on our PostgreSQL tables and views.
- Storage: Offers file storage with secure and controlled access.
- Management features: Includes tools for database administration, such as migrations and schema generation.
Supabase has a quite generous free tier. It is ideal for a wide range of applications, including real-time apps and IoT (which we really like on this site 😉).
To learn more about Supabase and start exploring its capabilities, we can visit the official Supabase documentation and explore the repository on GitHub for additional examples and source code.
Installation and Configuration of Supabase
First, we need to sign up for Supabase and create an account. Once registered, we can create a new project by following these steps:
- Log in to Supabase.
- Click on “New Project” and fill in the project details.
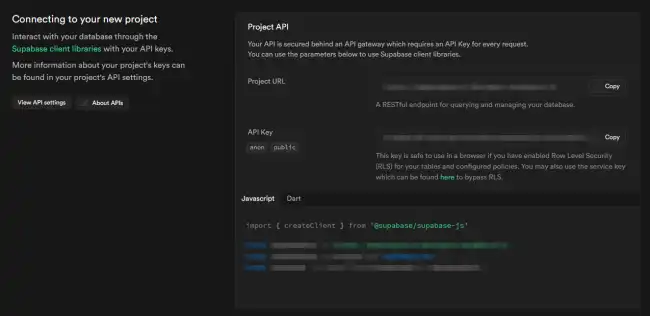
- After creating the project, we will be provided with the credentials and the URL of our API.
Installing the Supabase Client
To interact with Supabase from our application, we need to install the Supabase client. We can do this using npm, the package manager for Node.js. We run the following command at the root of our project:
npm install @supabase/supabase-jsHow to Use Supabase
Client Setup
Once we have installed the Supabase client, we need to configure it in our application. Here is how to do it in a JavaScript application.
import { createClient } from '@supabase/supabase-js';

const supabaseUrl = 'https://xyzcompany.supabase.co';
const supabaseKey = 'public-anon-key';
const supabase = createClient(supabaseUrl, supabaseKey);
User Authentication
Supabase provides a complete user authentication system. Below, we show how to register a new user and allow them to log in.
User Registration
const { user, error } = await supabase.auth.signUp({
  email: '[email protected]',
  password: 'example-password',
});

if (error) console.error('Error registering user:', error);
else console.log('User registered:', user);
Login
const { user, error } = await supabase.auth.signIn({
  email: '[email protected]',
  password: 'example-password',
});

if (error) console.error('Error logging in:', error);
else console.log('User logged in:', user);
Database Operations
Supabase automatically generates a RESTful API based on our PostgreSQL tables and views. Below, we show how to perform CRUD operations using the Supabase client.
Create the Table
We will need to run this SQL script to create the table that we will use in the remaining examples. You can do this from the Supabase dashboard.
-- Create the todos table
CREATE TABLE todos (
    id SERIAL PRIMARY KEY,
    task VARCHAR(255) NOT NULL,
    is_complete BOOLEAN DEFAULT FALSE,
    created_at TIMESTAMP DEFAULT CURRENT_TIMESTAMP
);

-- Optional: Add some sample data
INSERT INTO todos (task, is_complete)
VALUES
    ('Do the laundry', false),
    ('Buy groceries', false),
    ('Pay bills', true);
Create a New Record
const { data, error } = await supabase
  .from('todos')
  .insert([
    { task: 'Do the laundry', is_complete: false },
  ]);

if (error) console.error('Error inserting data:', error);
else console.log('Data inserted:', data);
Read Data
const { data, error } = await supabase
  .from('todos')
  .select('*');

if (error) console.error('Error fetching data:', error);
else console.log('Data fetched:', data);
Update a Record
const { data, error } = await supabase
  .from('todos')
  .update({ is_complete: true })
  .eq('id', 1);

if (error) console.error('Error updating data:', error);
else console.log('Data updated:', data);
Delete a Record
const { data, error } = await supabase
  .from('todos')
  .delete()
  .eq('id', 1);

if (error) console.error('Error deleting data:', error);
else console.log('Data deleted:', data);
File Storage
Create the Table
-- Create the avatars table to store file information
CREATE TABLE avatars (
    id SERIAL PRIMARY KEY,
    filename VARCHAR(255) NOT NULL,
    url TEXT NOT NULL,
    created_at TIMESTAMP DEFAULT CURRENT_TIMESTAMP
);

-- Optional: Add some sample data
INSERT INTO avatars (filename, url)
VALUES
    ('avatar1.png', 'https://your-supabase-bucket-url/avatar1.png'),
    ('avatar2.png', 'https://your-supabase-bucket-url/avatar2.png');
Upload a File
const { data, error } = await supabase
  .storage
  .from('avatars')
  .upload('public/avatar1.png', file);

if (error) console.error('Error uploading file:', error);
else console.log('File uploaded:', data);
Download a File
const { data, error } = await supabase
  .storage
  .from('avatars')
  .download('public/avatar1.png');

if (error) console.error('Error downloading file:', error);
else console.log('File downloaded:', data);