
In the post about installing the Arduino IDE and the introduction to Arduino, we mentioned that it is possible to use other programming environments for our Arduino projects. This allows us to bypass many limitations imposed by the standard IDE and use the full power of C++ in our projects.
Update: This post is from 2014.
I currently recommend using Visual Studio Code + Platformio
In this post, we are going to learn how to configure and program Arduino with Eclipse, one of the most popular programming environments at the moment. Eclipse is Open Source and is available for free for Linux and Windows. This tutorial is developed on Linux Ubuntu / Linux Mint, but the configuration for other operating systems is very similar.
The difficulty level of this tutorial is somewhat more advanced than the rest of the Arduino posts we have done so far, but with a little skill and by following the steps in order, you will be able to configure the IDE correctly easily.
Installing Eclipse
First, we are going to install the Eclipse IDE. To do this, open a terminal console and type
sudo apt-get install eclipse
Or we can download the program directly from the website https://www.eclipse.org/, ensuring we have the latest available version.
Installing avrdude
Now we are going to install AVRDUDE. The Atmega processors used in Arduino boards have an AVR architecture. This application will allow us to compile our C++ programs and load them onto the board directly from Eclipse.
To do this, type in the terminal
sudo apt-get install gcc-avr binutils-avr gdb-avr avr-libc avrdude make
Installing the AVR-EClipse Plugin
Next, we will install the “avr-eclipse” plugin, which allows using AVRDUDE functionalities from Eclipse.
To do this, open Eclipse and go to the menu (Help > Install New Software…). In the window that appears, in the “Work with:” line, type the address “http://avr-eclipse.sourceforge.net/updatesite”, and click “Add” to add the repository.  Select all available plugins and finish the installation, leaving the rest of the options as default.
New C++ Project
Now that we have Eclipse and AVRDUDE installed and connected through the AVR plugin, let’s create our first project and check that everything works correctly.
Select “New Project” and in the wizard that appears, choose “C++ Project”.  On the next screen, select “AVR Cross Target Application Project” as the project type and choose a name for our project.
 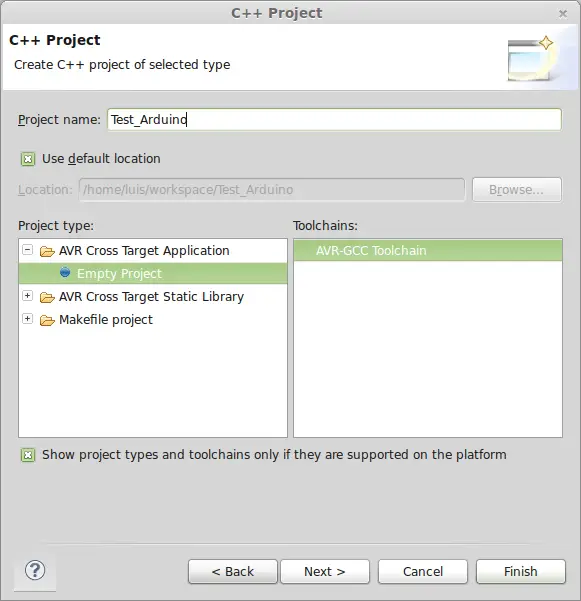 In the configuration window, select “Release”.
 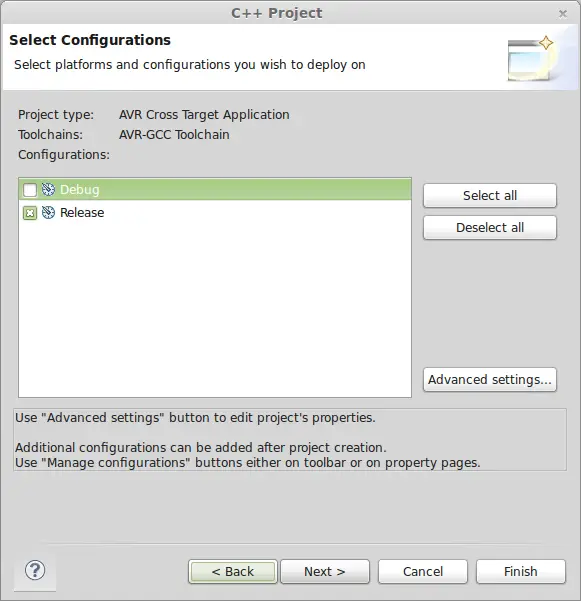 Leave the rest of the configurations as they are.
Add a new source code file by right-clicking on the project and choosing “Add source file”. Define the name of this first file as “main.cpp”, and finish by clicking OK. 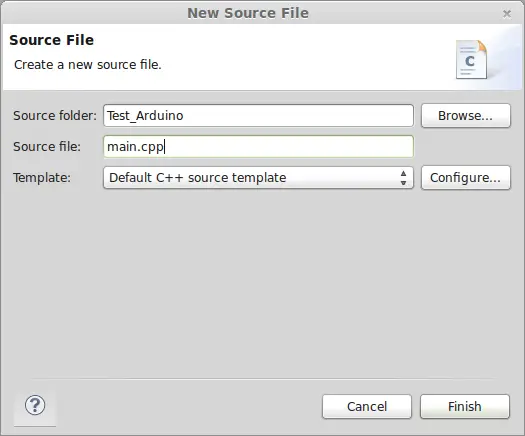 Right-click again on the project in the solution explorer, and select project properties. Leave only “Generate HEX file only for Flash memory” selected.
 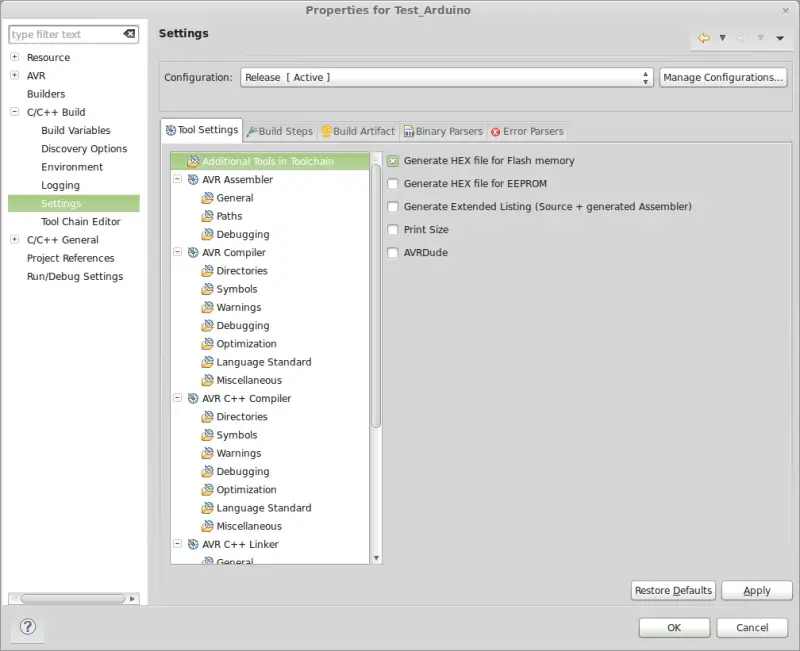 Now in the “Project” menu, deselect “build automatically”, so the program compiles only when we manually indicate it.
 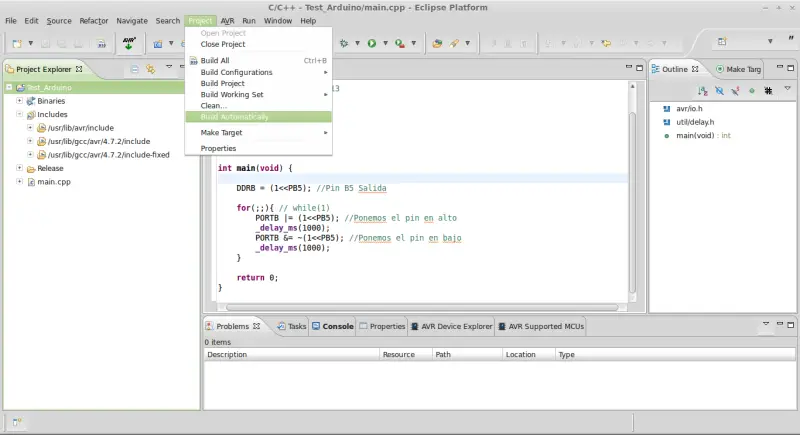 Finally, go to “Windows/Preferences”, and select the option “Save automatically before build”, so that source files are saved automatically before compiling.
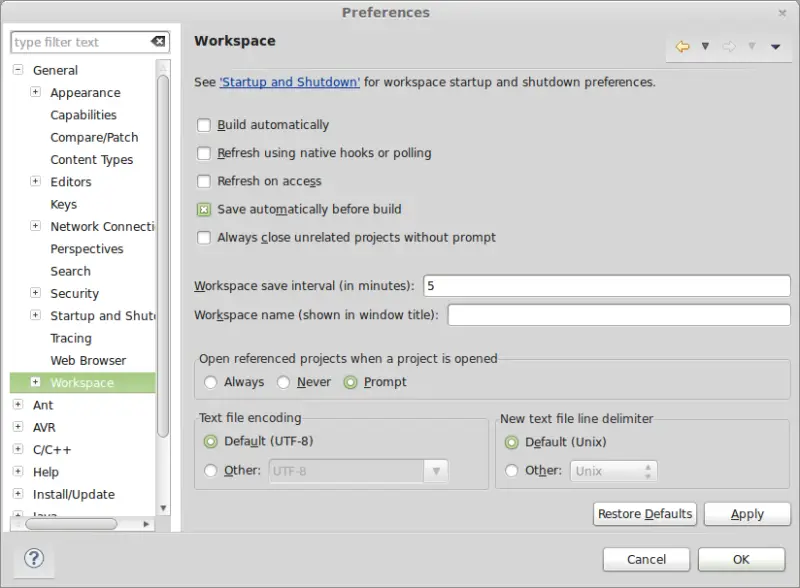
Testing Programming Arduino with Eclipse
Let’s check that we have configured everything correctly. To do this, copy this into the body of main.cpp
#include <avr/io.h>
#include <util/delay.h>

int main(void) {

  DDRB = (1<<PB5); //Pin B5 Output

  for(;;){ // while(1)
    PORTB |= (1<<PB5); //Set pin high
    _delay_ms(1000);
    PORTB &= ~(1<<PB5); //Set pin low
    _delay_ms(1000);
  }

  return 0;
}
Click on the arrow next to the “Build All” button and in the dropdown, choose “Release”. Finally, click the “Build All” button, which has a hammer symbol. 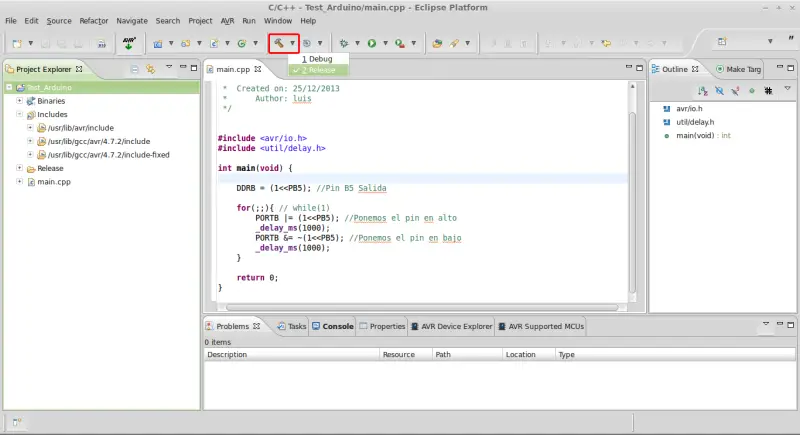 If there are no errors… congratulations! Everything is correctly configured and working, you can now program Arduino with Eclipse and use the full power of C++ in your programs. But wait… What is all that code? That looks nothing like Arduino!
Those of you who have programmed processors will recognize “that code”. What we see is the real programming of Atmel. The so-called “Wiring” is actually a series of libraries that hide and simplify the programming process. However, sometimes it is advantageous and more efficient to program directly at a low level.
Those who want to delve deeper into low-level Arduino programming can find more information by consulting the following link Atmel Datasheet
Very interesting but… How do we get our Arduino libraries back? In the next post we will see how to configure our project so we can program Arduino with Eclipse in the same clean and understandable language we are used to in the standard IDE.
Download the Code
All the code from this post is available for download on Github.