Let’s see how to record our program or script on a device, so that the board runs the program autonomously (without a PC connected).
So far we have created our first program (blink) and we have seen how it runs through the MicroPython REPL.
But, when we disconnect the device and reconnect it, the program is not saved. That is, we have not saved our program on the device.
Logically, we want to be able to upload our program to the board, and have it run the next time it reboots. So let’s see how to do it.
File system on the board
Normally, in an embedded system, when we want to save our program we flash it onto the device, overwriting its configuration.
But in the case of MicroPython, we already have firmware loaded on the device. Which is, precisely, the Python interpreter. So we cannot overwrite it.
Instead, MicroPython works with a file system, which is very similar to that of a computer, with directories and files.
- Main file (
main.py): This file runs automatically when the board boots. It is the main entry point for any project. - Module files: You can create custom modules (for example,
sensor.py) and use them in your main program.
For example, our project could have the following structure,
📂 // ├── 📄 main.py
├── 📄 sensor.py
├── 📄 config.json
└── 📂 data/
└── 📄 log.txt
That is, to upload our project we need to upload our directory and file structure to the device. On boot, MicroPython will execute the main.py file.
Tools for file transfer
The different IDEs and tools provide file transfer to a MicroPython board. Let’s see how to do it in the most popular ones,
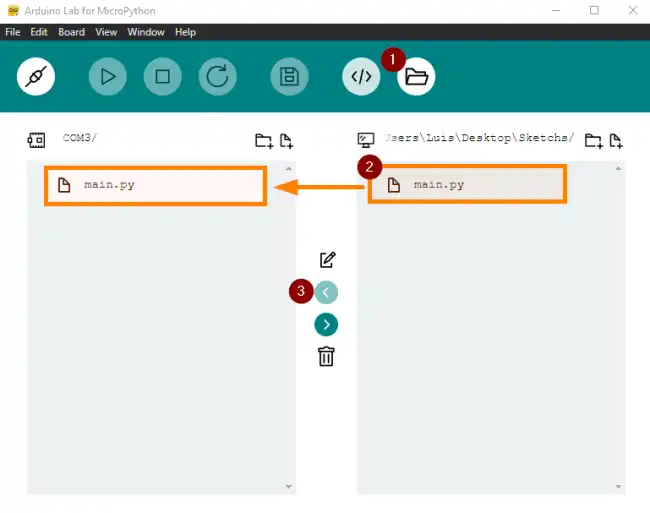
In Arduino Lab for MicroPython, you have an icon with a folder symbol. Clicking it opens a window.
We can select files from our computer and upload them to the device’s memory.
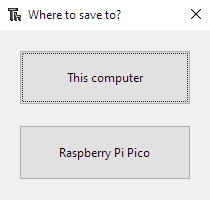
In Thonny, to upload the file we simply need to choose File > Save as....
A window will appear with two options, where we can choose our device.
ampy (Adafruit MicroPython Tool) is a command-line tool that allows interaction with MicroPython boards from the terminal.
We can install it with this command:
pip install adafruit-ampy
To transfer files with ampy, connect the board and get the serial port (for example, /dev/ttyUSB0 on Linux or COM3 on Windows). Run the following command,
ampy —port /dev/ttyUSB0 put archivo.py
To verify that the file has been transferred correctly, you can list the files on the board:
ampy —port /dev/ttyUSB0 ls
Multiple file transfer
In more complex projects, it is common to need to transfer multiple files to the board. Below, we show you how to do it:
In Arduino Lab we can upload folders from the window we’ve seen. If we have several files inside the folder, it will upload them all.
Interestingly, it lets me select multiple files outside the folder (this part of the UI is frankly in need of improvement).
In Thonny, we can activate a file explorer by clicking on View / Files.
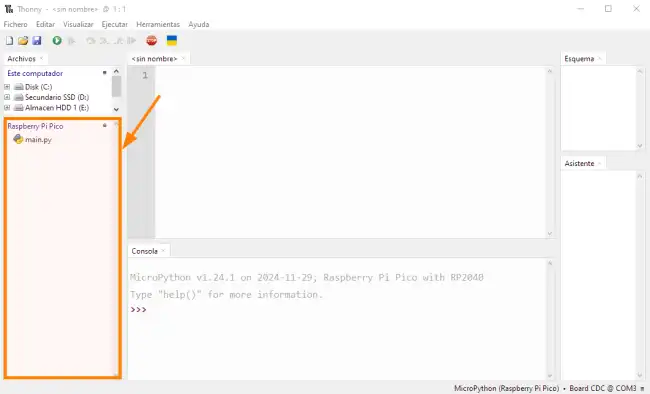
In this window, which is frankly very good, we can drag and drop multiple files, folders, or whatever we want (positive point, Thonny).
We can also create a small script to automate the transfer with ampy (useful in projects with many, many, many files).
import os
import subprocess

port = "/dev/ttyUSB0"  # Change this according to your port
files = ["main.py", "sensor.py", "config.json"]

for file in files:
    subprocess.run(["ampy", "--port", port, "put", file])