The WebP format is a highly efficient image format in terms of size and quality, and it is becoming increasingly common in the web environment.
WebP has many advantages over JPG or PNG
- Superior Compression: WebP can reduce the size of images without sacrificing visual quality. This results in faster loading times for web pages.
- Support for Transparency: Like PNG, WebP supports images with transparency, but with generally smaller file sizes.
- Lossy and Lossless Compression: WebP offers both lossy and lossless compression, providing flexibility depending on quality and size needs.
However, configuring Internet Information Services (IIS) to serve this type of image can be a challenge, as IIS does not recognize the WebP format as a legitimate MIME type by default.
Incredible… 🤡.
But, fortunately, this can be easily fixed with a few steps. To enable WebP image support in IIS, we do the following:
Open IIS Manager First, we need to open IIS Manager. We can do this by searching for “IIS Manager” in the start menu or by running
inetmgrfrom the run window (Win + R).Select the Main Server We click on the main server in the left panel to ensure that we are making the change at the server level (rather than at the site level). This will apply the configuration to all websites running on the IIS server.
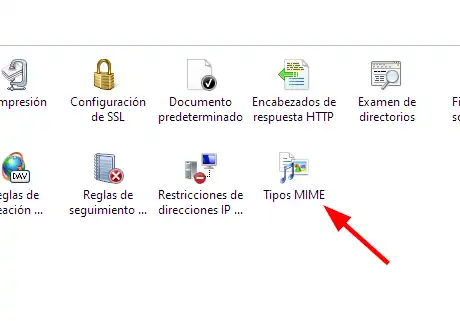
Access MIME Types In the right panel, we look for and click on the MIME Types option. This will open a list of all the MIME types currently configured in IIS.

Add a New MIME Type In the right panel of the MIME Types window, we click on the Add… link. This will open a dialog where we can specify a new MIME type.
Configure the MIME Type for WebP To add a new WebP MIME type as an image type, we enter
.webpas the file name extension andimage/webpas the MIME type. Then, we click OK.

- Verify the Configuration After adding the MIME type, we should see
.webplisted among the MIME types in IIS. Now, if we refresh our Chrome browser (or another compatible browser), we should be able to view both WebP image files correctly.

