In this tutorial, we will explore how to create a hybrid desktop application that combines WPF for the desktop interface, ASP.NET Core as the backend, and Vue.js as the frontend.
If you followed the previous article, you already have a solid foundation, as integrating Vue is not too different from integrating React.
Today we will focus on Vue.js, a progressive and flexible framework that integrates perfectly with our hybrid solution (and it’s one of my favorite web frameworks 😊).
If you missed the previous article, here it is:
How to Create a Hybrid WPF + ASP.NET Core + React Application
Create the Vue.js Project
To get started, we need to create our web application in Vue.js. We open a terminal at the root of the solution and run the following commands:
npm create vite@latest ClientVue --template vue
cd ClientVue
npm install
This will generate a basic project structure in Vue.js using Vite as the build tool.
Configure Vue.js to Work with the Backend
For our Vue.js application to communicate correctly with the ASP.NET Core backend, we need to set up our web environment correctly.
First, we create a .env file in the ClientVue folder with the following line:
VITE_API_URL=http://localhost:5000Next, we create a .env.production file in the ClientVue folder with the following line:
VITE_API_URL=Then, we modify the vite.config.js file to set up the proxy:
import { defineConfig } from "vite";
import vue from "@vitejs/plugin-vue";

export default defineConfig({
    plugins: [vue()],
    server: {
        proxy: {
            "/api": "http://localhost:5000", // Redirect requests to the C# API
        },
    },
});
With this configuration, all requests starting with /api will be automatically redirected to our ASP.NET Core server, avoiding CORS issues.
Create the Vue Application
Now, let’s create a simple Vue.js application that demonstrates how to consume the ASP.NET Core API. We start by defining the main component App.vue:
<template>
  <div>
    <nav>
      <router-link to="/">Home</router-link>
      <router-link to="/about">About</router-link>
      <router-link to="/fetch">Fetch</router-link>
      <router-link to="/signalr">SignalR</router-link>
    </nav>
    <router-view />
  </div>
</template>

<script setup>
// Here you can add additional logic if necessary
</script>

<style scoped>
/* Specific styles for this component */
</style>
This component defines a basic navigation menu that allows us to move between the different pages of the application.
Add the Router
To handle the routes in our application, we need to install vue-router:
npm install vue-routerThen, we create a router.js file that defines the application routes:
import { createRouter, createWebHistory } from 'vue-router';
import Home from './views/Home.vue';
import About from './views/About.vue';
import Fetch from './views/Fetch.vue';
import SignalR from './views/SignalR.vue';

const routes = [
  { path: '/', component: Home },
  { path: '/about', component: About },
  { path: '/fetch', component: Fetch },
  { path: '/signalr', component: SignalR },
];

const router = createRouter({
  history: createWebHistory(),
  routes,
});

export default router;
Finally, we modify main.js to use the router:
import { createApp } from 'vue';
import './style.css';
import App from './App.vue';
import router from './router';

createApp(App).use(router).mount('#app');
Create the Views
Now we will create the views for our application in the src/views folder. Our Demo will have the following views:
The homepage is simple and just shows a welcome message:
<template>
  <div>
    <h1>Home</h1>
    <p>Welcome to the hybrid WPF + ASP.NET Core + Vue.js application.</p>
  </div>
</template>This page is static and serves as an example of how to create simple pages:
<template>
  <div>
    <h1>About</h1>
    <p>This is a hybrid application that combines WPF, ASP.NET Core, and Vue.js.</p>
  </div>
</template>This page demonstrates how to consume data from the ASP.NET Core API. We use three endpoints: /api/demo, /weatherforecast, and /files.
<script setup>
import { ref, onMounted } from 'vue';

const data = ref(null);
const forecasts = ref([]);
const files = ref([]);

onMounted(() => {
  fetch(`${import.meta.env.VITE_API_URL}/api/demo`)
    .then(res => res.json())
    .then(result => data.value = result);

  populateWeatherData();
  getFiles();
});

async function populateWeatherData() {
  const response = await fetch(`${import.meta.env.VITE_API_URL}/weatherforecast`);
  if (response.ok) {
    forecasts.value = await response.json();
  }
}

async function getFiles() {
  const response = await fetch(`${import.meta.env.VITE_API_URL}/files`);
  if (response.ok) {
    files.value = await response.json();
  }
}
</script>

<template>
  <div>
    <h1>{{ data?.message || 'Loading...' }}</h1>
    <ul v-if="forecasts.length > 0 && files.length > 0">
      <li v-for="file in files" :key="file">{{ file }}</li>
    </ul>
    <p v-else>
      <em>Loading... Please wait for the ASP.NET backend to start.</em>
    </p>
  </div>
</template>This page shows how to integrate SignalR to receive real-time updates from the server:
<script setup>
import { ref, onMounted } from 'vue';
import { HubConnectionBuilder } from '@microsoft/signalr';

const time = ref('');

onMounted(() => {
  const connection = new HubConnectionBuilder()
    .withUrl(`${import.meta.env.VITE_API_URL}/clockHub`)
    .build();

  connection.on('ReceiveTime', (currentTime) => {
    time.value = currentTime;
  });

  connection.start()
    .then(() => console.log('SignalR connection established.'))
    .catch(err => console.error('Error connecting to SignalR: ', err));
});
</script>

<template>
  <div>
    <h1>Current Time</h1>
    <p>{{ time || 'Disconnected' }}</p>
  </div>
</template>
Add Basic Styles
To give our application a more professional look, we add some CSS. Here’s a basic example:
body {
  font-family: Arial, sans-serif;
  margin: 0;
  padding: 0;
  background-color: #f4f4f9;
  color: #333;
}

nav {
  background-color: #1f1d21;
  padding: 1rem;
  display: flex;
  gap: 1rem;
}

nav a {
  color: white;
  text-decoration: none;
  font-weight: bold;
}

nav a:hover {
  text-decoration: underline;
}

.container {
  padding: 2rem;
}

h1 {
  color: #1f1d21;
}
Run the Application
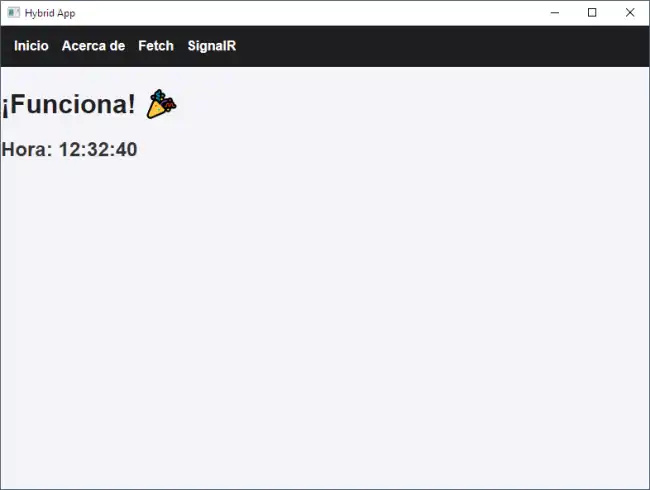
Finally, we run our App, as we did in the previous entry. And we will see a very similar result (basically the same) but this time with Vue under the hood.
Download the Code
All the code for this tutorial is available on GitHub so you can explore it and adapt it to your needs:

In the next tutorial, we will see how to integrate Astro into our hybrid application. Don’t miss it! 🚀