We continue and conclude the series of tutorials dedicated to seeing how a hybrid desktop application works by learning how to combine our .NET Backend, this time with a frontend in Astro.
We have already seen how to integrate popular development frameworks like React or Vue.js. Today we will focus on Astro, a modern framework that allows you to comfortably build web applications that are fast and highly optimized.
One of Astro’s advantages will be the possibility of its island hydration, which allows us to use components from other frameworks (including React and Vue).
Furthermore, its static routing system will save us from having to use a framework’s router, among many other advantages. So let’s get to it 👇.
If you missed the previous articles, here they are: How to Create a Hybrid WPF + ASP.NET Core + React Application How to Create a Hybrid WPF + ASP.NET Core + Vue.js Application
Create the Astro Project
To begin, we need to create our web application with Astro. Open a terminal at the solution’s root and run the following commands:
npm create astro@latest AstroClient cd AstroClient npm install
This will generate a basic Astro project for us, a framework known for its performance and flexibility.
Configure Astro to Work with the Backend
Just like with the React and Vue examples, we need to configure our Astro application to communicate correctly with the ASP.NET Core backend.
First, create a .env file in the AstroClient folder with the following line:
PUBLIC_API_URL=http://localhost:5000
And a .env.production file, which will allow the application to work in production even if the ASP app’s port is dynamic.
PUBLIC_API_URL=
Notice that this time the variable is called PUBLIC_API_URL, and not VITE_API_URL like in the previous tutorials.
On the other hand, modify the vite.config.js file to configure the proxy:
import { defineConfig } from "vite";
import vue from "@vitejs/plugin-vue";

export default defineConfig({
    plugins: [vue()],
    server: {
        proxy: {
            "/api": "http://localhost:5000", // Redirects requests to the C# API
        },
    },
});
With this configuration, all requests starting with /api will be automatically redirected to our ASP.NET Core server, avoiding CORS issues and simplifying development.
Add Vue Integration (Optional)
One of Astro’s advantages is that we can use its island hydration to integrate components from other frameworks, like Vue (for our demo, we are going to add Vue integration).
npm install @astrojs/vue
Then, modify the astro.config.mjs file to include the Vue integration:
import { defineConfig } from 'astro/config';
import vue from '@astrojs/vue';

export default defineConfig({
  integrations: [vue()],
});
Create the Layout
We also add a basic layout that will serve as a common structure for all our pages. To do this, create a Layout.astro file in the src/layouts folder:
---
import Navbar from "../components/Navbar.vue";
---

<html lang="en">
  <head>
    <meta charset="UTF-8" />
    <meta name="viewport" content="width=device-width, initial-scale=1.0" />
    <title>Astro + Vue App</title>
  </head>
  <body>
    <Navbar />
    <main>
      <slot />
    </main>
  </body>
</html>
Create the Pages
Now let’s create our pages. Astro uses a file-based routing system. This means that each file we have in the src/pages path will eventually become an endpoint in our application.
Let’s look at the pages we have.
The home page is simple and only shows a welcome message:
---
import Layout from '../layouts/Layout.astro';
---

<Layout>
  <h1>Home</h1>
  <p>This is the Home page.</p>
</Layout>
This page is static and serves as an example of how to create simple pages:
---
import Layout from '../layouts/Layout.astro';
---

<Layout>
  <h1>About</h1>
  <p>This is the "About" page.</p>
</Layout>
On this page, we demonstrate how to retrieve parameters from the URL and pass them to a Vue component:
---
import Layout from '../layouts/Layout.astro';
import QueryParams from '../components/QueryParams.vue';
---

<Layout>
  <QueryParams client:load/>
</Layout>
This page shows how to consume data from the ASP.NET Core API using a Vue component:
---
import Layout from '../layouts/Layout.astro';
import Fetch from '../components/Fetch.vue';
---

<Layout>
  <h1>Welcome to the App</h1>
  <Fetch client:load/>
</Layout>
This page integrates SignalR to receive real-time updates from the server:
---
import Layout from '../layouts/Layout.astro';
import ClockComponent from '../components/ClockComponent.vue';
---

<Layout>
  <ClockComponent client:load/>
</Layout>
Create the Components
We already have the pages created. Now, to add dynamism to our web, we can use a framework like React or Vue, and Astro’s island functionality.
I had already mentioned that for this example we were going to integrate Vue.js. Let’s look at the Vue components we would need for our application.
The navigation menu (this could perfectly have been done in Astro).
<template>
  <nav>
    <ul>
      <li><a href="/">Home</a></li>
      <li><a href="/about">About</a></li>
      <li><a href="/query?q=123">Query</a></li>
      <li><a href="/fetch">Fetch</a></li>
      <li><a href="/signalr">SignalR</a></li>
    </ul>
  </nav>
</template>
This component shows how to retrieve and display URL parameters. In the case of Astro, the routing is being done through Astro, which converts pages into static Routes.
Therefore, in this example, we are going to see how we could obtain the parameters that would be passed between pages, to function like an SPA.
<script setup>
import { ref, onMounted } from 'vue';

const params = ref({});
const data = ref(null);

onMounted(async () => {
  const urlSearchParams = new URLSearchParams(window.location.search);
  params.value = Object.fromEntries(urlSearchParams.entries());

  if (params.value.id) {
    const response = await fetch(`${import.meta.env.PUBLIC_API_URL}/api/data?id=${params.value.id}`);
  }
});
</script>

<template>
  <div>
    <h2>Query Parameters</h2>
    <pre>{{ params }}</pre>
  </div>
</template>
This component consumes data from the ASP.NET Core API:
<script setup>
import { ref, onMounted } from 'vue';

const data = ref(null);
const forecasts = ref([]);
const files = ref([]);

onMounted(() => {
  fetch(`${import.meta.env.PUBLIC_API_URL}/api/demo`)
    .then(res => res.json())
    .then(result => data.value = result);

  populateWeatherData();
  getFiles();
});

async function populateWeatherData() {
  const response = await fetch(`${import.meta.env.PUBLIC_API_URL}/weatherforecast`);
  if (response.ok) {
    forecasts.value = await response.json();
  }
}

async function getFiles() {
  const response = await fetch(`${import.meta.env.PUBLIC_API_URL}/files`);
  if (response.ok) {
    files.value = await response.json();
  }
}
</script>

<template>
  <div>
    <h1>{{ data?.message || 'Loading...' }}</h1>
    <ul v-if="forecasts.length > 0 && files.length > 0">
      <li v-for="file in files" :key="file">{{ file }}</li>
    </ul>
    <p v-else>
      <em>Loading... Please wait for the ASP.NET backend to start.</em>
    </p>
  </div>
</template>
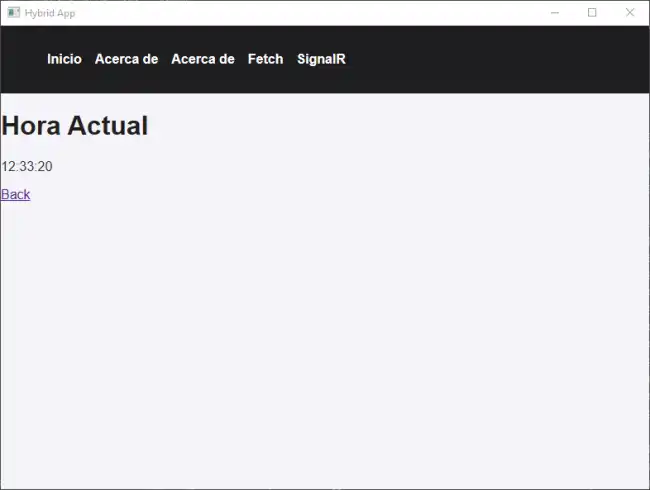
Finally, this component shows the current time using SignalR, to illustrate how real-time communication between Backend and Frontend works.
<script setup>
import { ref, onMounted } from 'vue';
import { HubConnectionBuilder } from '@microsoft/signalr';

const time = ref('');

onMounted(() => {
  const connection = new HubConnectionBuilder()
    .withUrl(`${import.meta.env.PUBLIC_API_URL}/clockHub`)
    .build();

  connection.on('ReceiveTime', (currentTime) => {
    time.value = currentTime;
  });

  connection.start()
    .then(() => console.log('SignalR connection established.'))
    .catch(err => console.error('Error connecting to SignalR: ', err));
});
</script>

<template>
  <div>
    <h1>Current Time</h1>
    <p>{{ time || 'Disconnected' }}</p>
  </div>
</template>
One of the interesting parts of the integration with Astro and component islands is that you will have to decide which part you do as Astro components, and which part as components from another Framework.
In this demo, I used Astro practically only for the pages, and all the weight is on the Vue.js components. But, in general, it’s normal that you would only use a framework for dynamic components, and leave everything else to Astro.
Add Basic Styles
Finally, just as we did in the two React and Vue examples, let’s add a bit of CSS to give our application a more professional look:
<style is:global>
  body {
    font-family: Arial, sans-serif;
    margin: 0;
    padding: 0;
    background-color: #f4f4f9;
    color: #333;
  }

  nav {
    background-color: #1f1d21;
    padding: 1rem;
    display: flex;
    gap: 1rem;
  }

  nav ul {
    list-style: none;
    display: flex;
    gap: 1rem;
  }

  nav a {
    color: white;
    text-decoration: none;
    font-weight: bold;
  }

  nav a:hover {
    text-decoration: underline;
  }

  .container {
    padding: 2rem;
  }

  h1 {
    color: #1f1d21;
  }
</style>
Run the Application
Once everything is configured, you can run the application and see our hybrid application working.
Download the Code
All the code for this post is available for download on Github.

And that’s it! With this tutorial, you have learned how to integrate Astro into a hybrid WPF + ASP.NET Core application. I hope it has been useful to you and that you enjoy working with these technologies. Until next time! 🚀