Before starting to program in C++, we need to install an Integrated Development Environment (IDE). Visual Studio is one of the most complete and widely used for C++ programming.
C++ in Visual Studio is also called MSVC (Microsoft Visual C++), and it uses a compiler from Microsoft.
Visual Studio is available for Windows and its download is free in the Community version, which includes all the necessary tools for C++ development.
Let’s see how to install it and how to configure it to use C++ 👇
Installing Visual Studio
Before configuring Visual Studio, we must install it. Simply Visit the official Visual Studio website https://visualstudio.microsoft.com/es/ and select the Community version of Visual Studio.
The Community version is free and suitable for most personal projects.
Once the installer is downloaded, run it to start the installation process. During installation, Visual Studio will allow you to choose the tools and components you want to install.
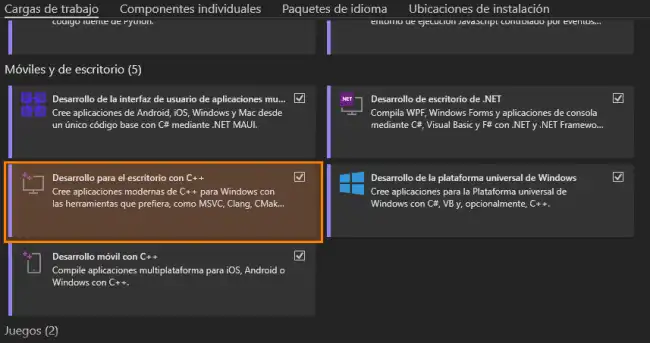
For C++, select the option Desktop development with C++. Then click Install (be patient, it will take a little while).
If you want to learn more, check out the Introduction to Programming Course.
Creating a C++ Project
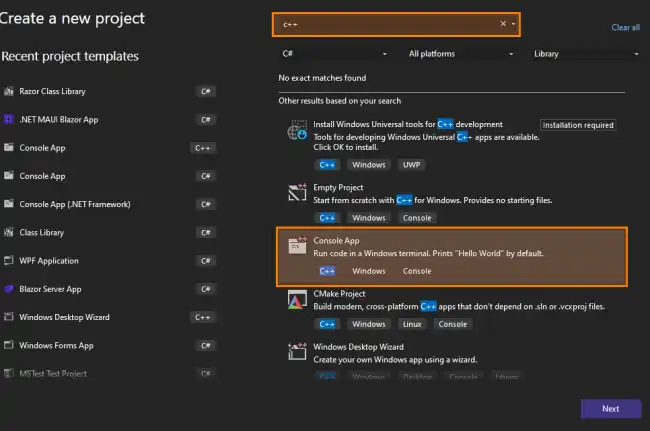
To create a new C++ project in Visual Studio, click on File and then on New project.
Choose the C++ Console App template. This type of project is ideal for learning and practicing, as it allows you to run and see results directly in the console.
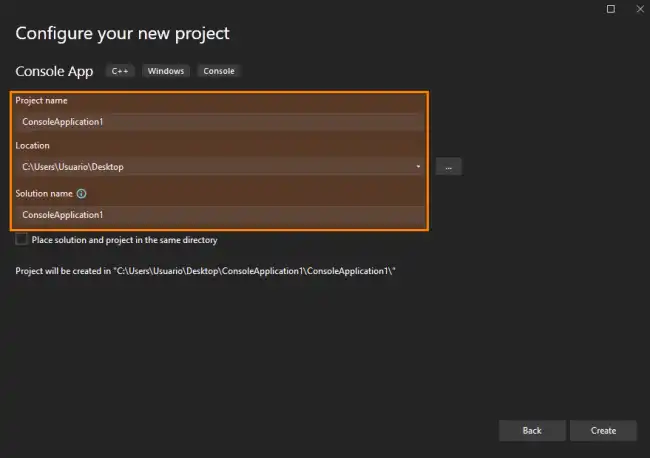
Now we need to give the project a name, select the location where you want to save it, and click Create.
Finally, the main editor window will open, with the main.cpp file created and ready for our code.
Writing and Running Code in C++
You can start writing your code in the main.cpp file that was automatically created when you set up the project. For example,
#include <iostream>

int main() {
    std::cout << "Hello, world in C++ from LuisLlamas.es!" << std::endl;
    return 0;
}
We will see each line in detail later. For now, don’t worry, we are just setting up the environment.
Compilation and Execution
To run your program click on Debug > Start Debugging (or press F5). Visual Studio will analyze the code for errors and compile it.
When running the program, a console window will open displaying the message
Hello, world in C++ from LuisLlamas.es!
Congratulations, you now have Visual Studio ready to work with C++.
Build Configuration
Visual Studio allows building in two main configurations: Debug and Release.
- Debug is used for development and debugging.
- Release is used when you want to generate an optimized version for distribution.
You can select the desired configuration in the top bar of Visual Studio, where the dropdown list with Debug and Release options appears.
Debugging
One of the main advantages of using Visual Studio is that its debugging tools are a joy, and they make it very easy to find and fix errors.
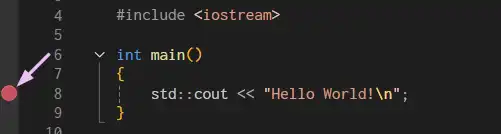
To do this, we can set breakpoints to the left of the line of code where you want the program to stop.
The program will run until it reaches the breakpoint, allowing you to examine the program’s state. This is useful for seeing the state of variables and the logic at different points in the program.
There are many more debugging tools, like conditional breakpoints, stack visualization… you can explore them little by little.
Environment Configuration for C++
Generally, in any project you will have to configure options. And, truth be told, it’s not one of the prettiest parts of MSVC (not everything was going to be beautiful).
To access the options, right-click on the project and select Properties.
For example, we can select the C++ version we are going to use, in C/C++ > General. In C++ Language Standard, select the version you want to use, such as C++17 or C++20.

From here you can also Configure the include directories. If your project needs external libraries, you must tell Visual Studio in which directory they are located.
This is done in Project > Properties > C/C++ > General > Additional Include Directories.